Initialize Project from Existing Sources
Initialize Project from Existing Sources
Content:- Initialize from Existing Sources in IDEA
- Initialize from Existing Sources in WebStorm and small IDEs
Initialize from Existing Sources in IDEA
Community and Ultimate IDEAs provide the 'Import Project' action to initialize a new project with existing sources. You just need to do the following steps:- Close your current project, if it is opened. You can find it in menu File -> Close Project
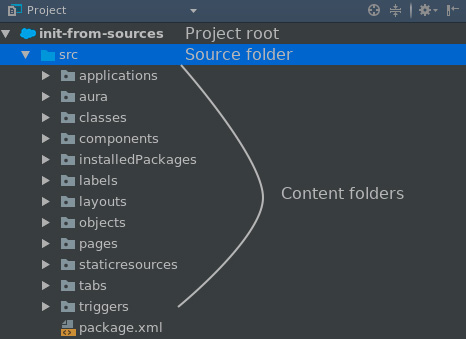
- Be sure that you have correct project structure to init

- Choose 'Import project' action in the Welcome screen
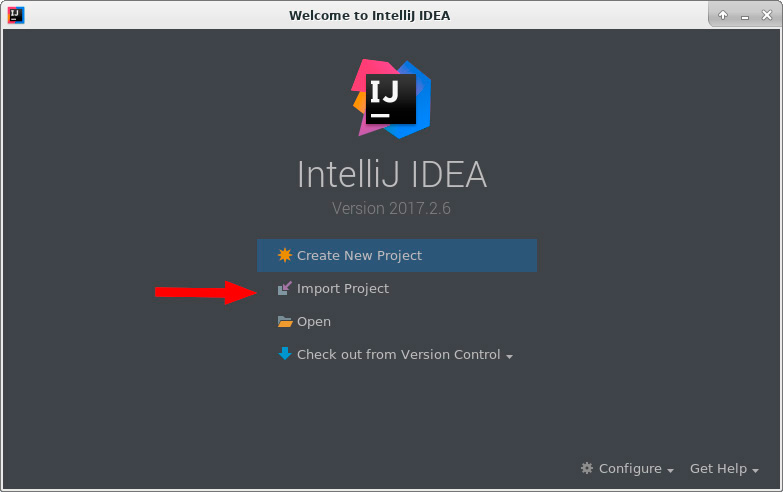
- Press 'Next' in 'Import Project' dialog and JetForcer project will be initialized step by step
Initialize from Existing Sources in WebStorm and small IDEs
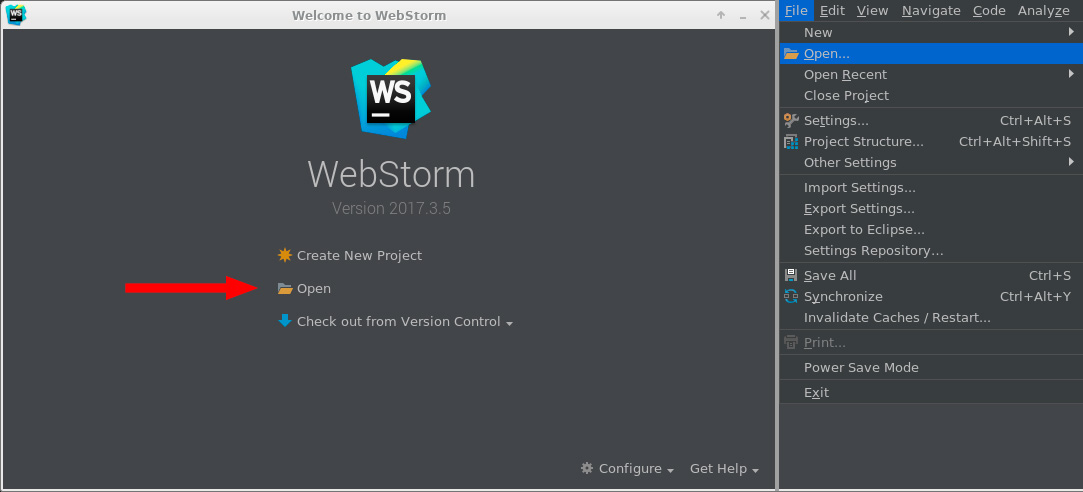
Sometime 'Import Project' action is unavailable in IDEs like WebStorm and you have to do the following sequence to initialize project from your sources- At the first be sure of your project structure
- Open your project with your IDE from Welcome Screen or from your current project
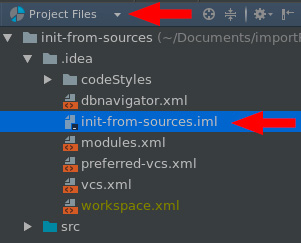
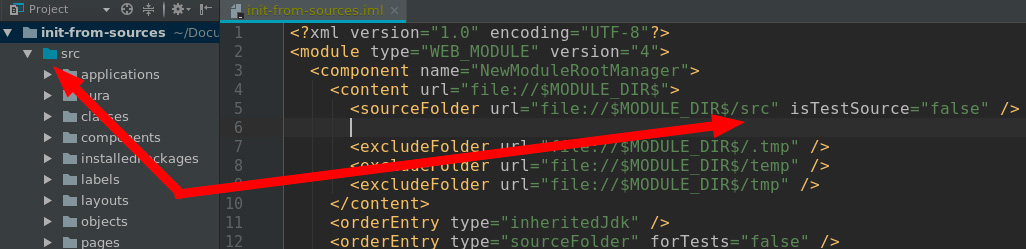
- Register source folder You have to add this line <sourceFolder url="file://$MODULE_DIR$/src" isTestSource="false" /> to your .iml file. You can find .iml file in the root of your project in .idea folder. Sometime .idea folder is hidden, so turn Project view to Project Files. Your .iml file will have name as your project's name.
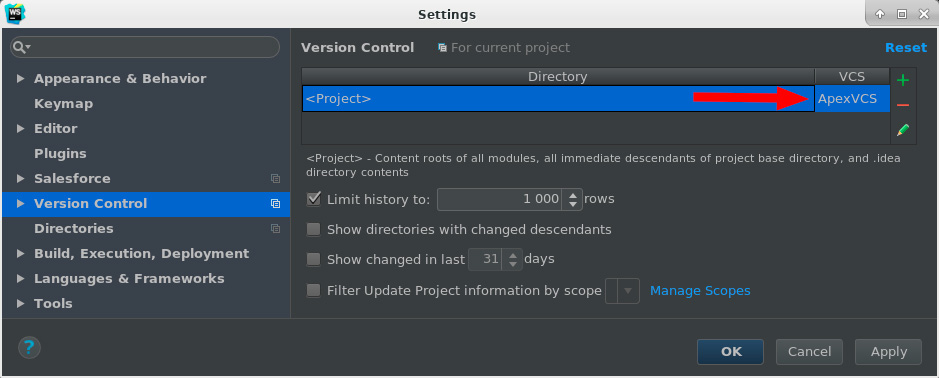
- Register ApexVCS (optional) If you want to push existing sources to your org, you need to register ApexVCS and choose account. Open File -> Settings -> Version Control -> Select ApexVCS for project root
- Accept local VCS state (optional). Choose VCS -> ApexVCS -> Accept Local State as Server State
- Restart your ide or just close and open project to reload changes