In this article we will take a closer look at how to manage Salesforce metadata with JetForcer and IntelliJ IDEA.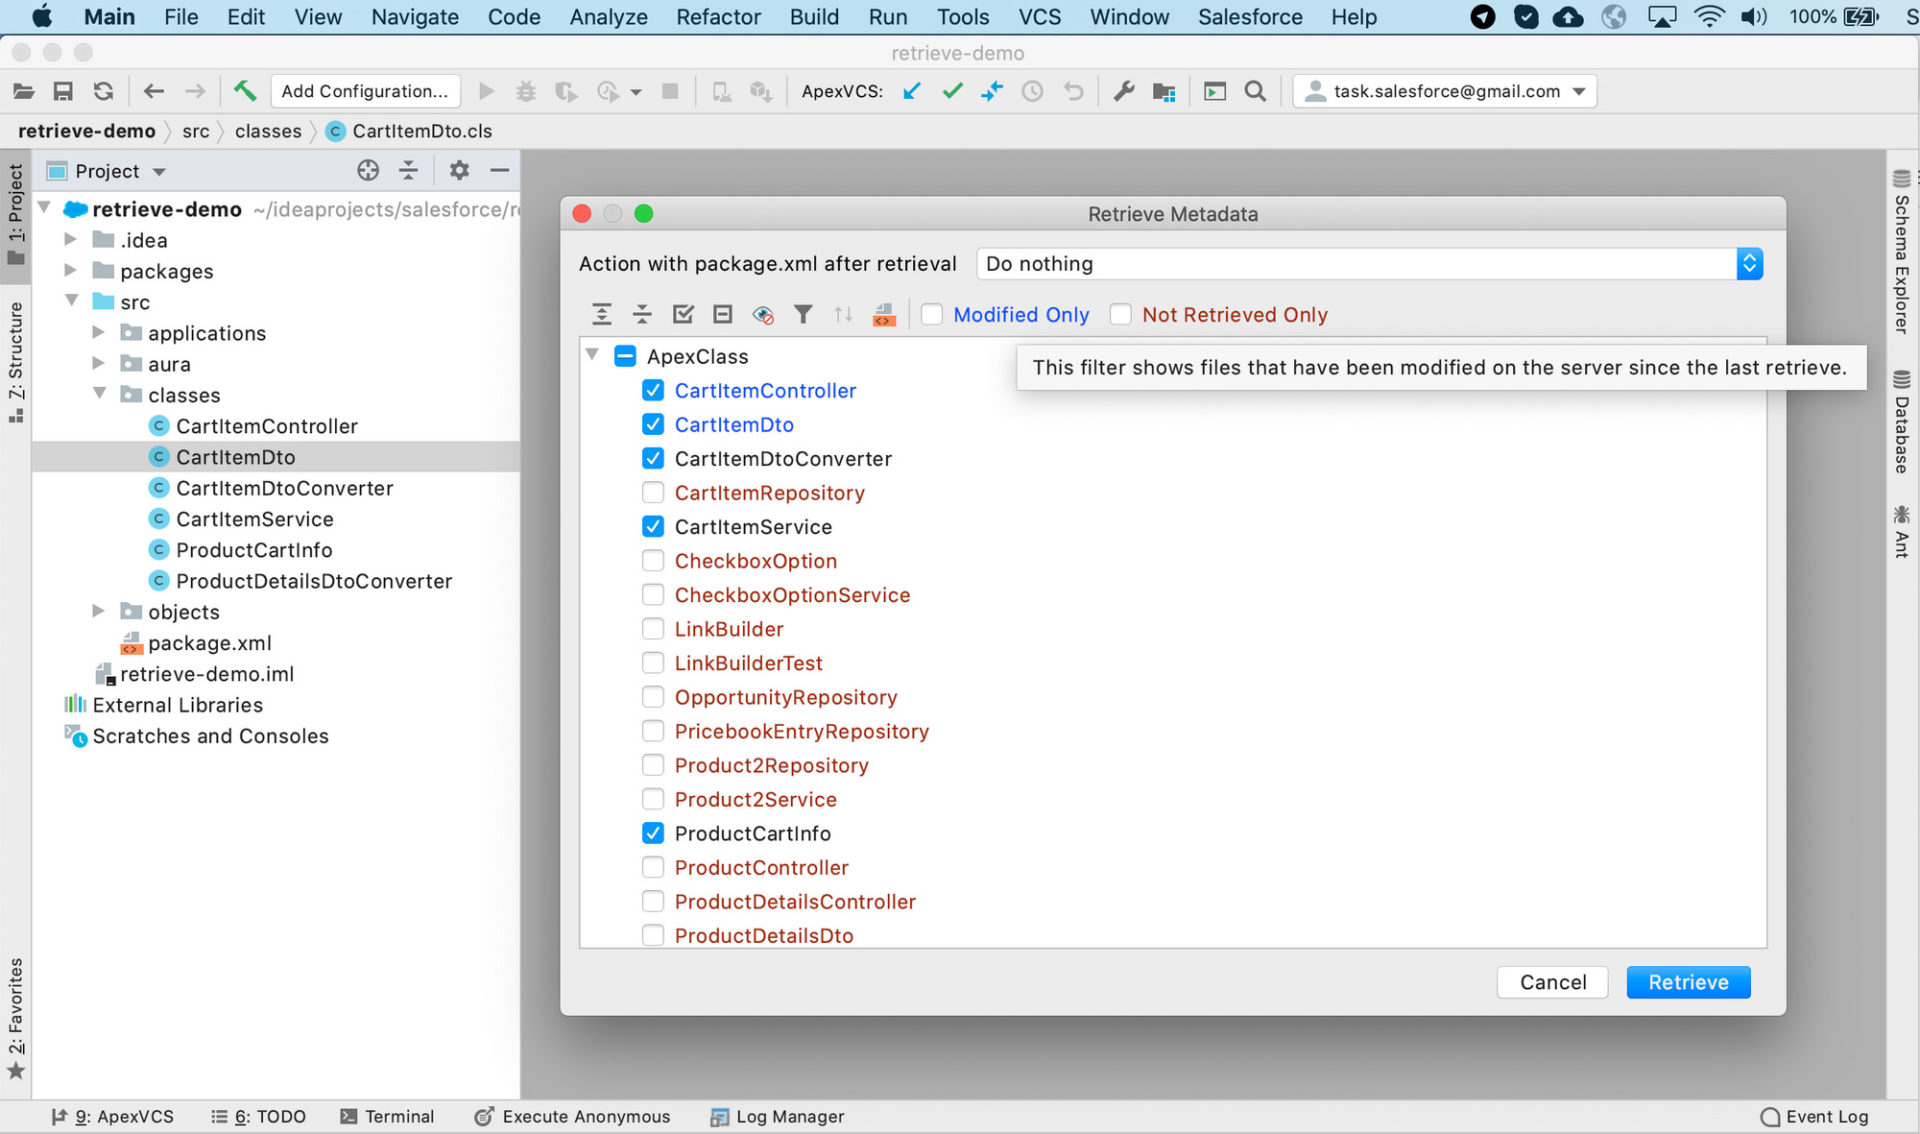
Agenda
Working with Salesforce organizations requires some special approaches to interactions with the codebase. Whereas developing in the cloud-based Developer Console all interactions with metadata file state are hidden from the developer, in local code editors metadata management is controlled by developers.
Both approaches have pros and cons, but this is a topic for a separate blog. In this article we will take a closer look at how to manage Salesforce metadata with JetForcer and IntelliJ IDEA.
Retrieve the Salesforce Project onto Your Local Machine
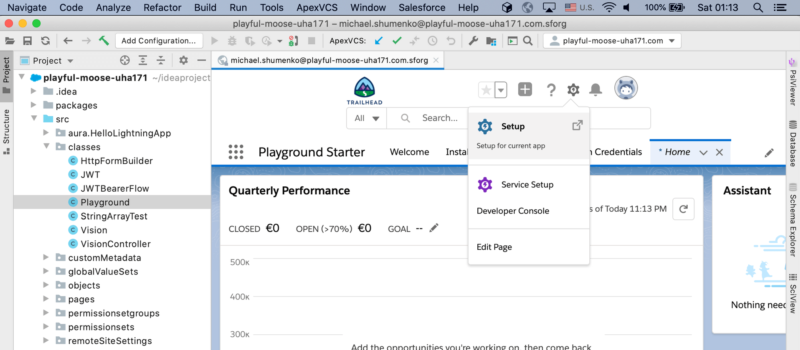
First of all, to start working, you need to retrieve your code sources onto your local machine. In terms of development in JetBrains IDEs, this action calls Create New Project. JetForcer provides the ability to do this from several places:
From Welcome Screen
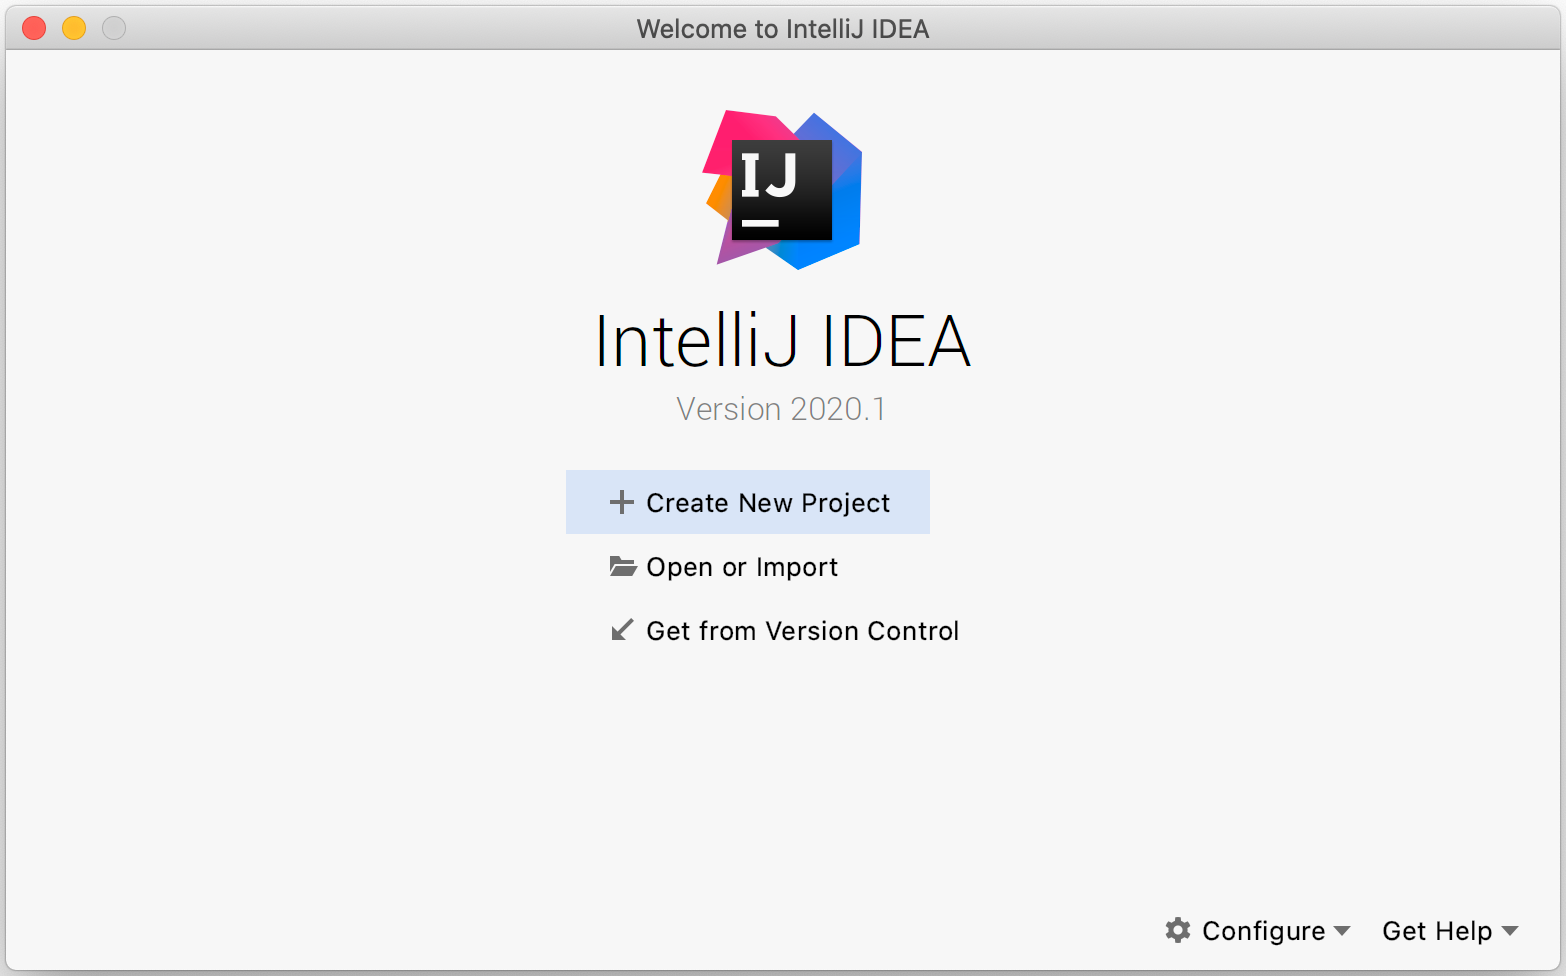 Create Project from Welcome Screen
From Main Action Toolbar
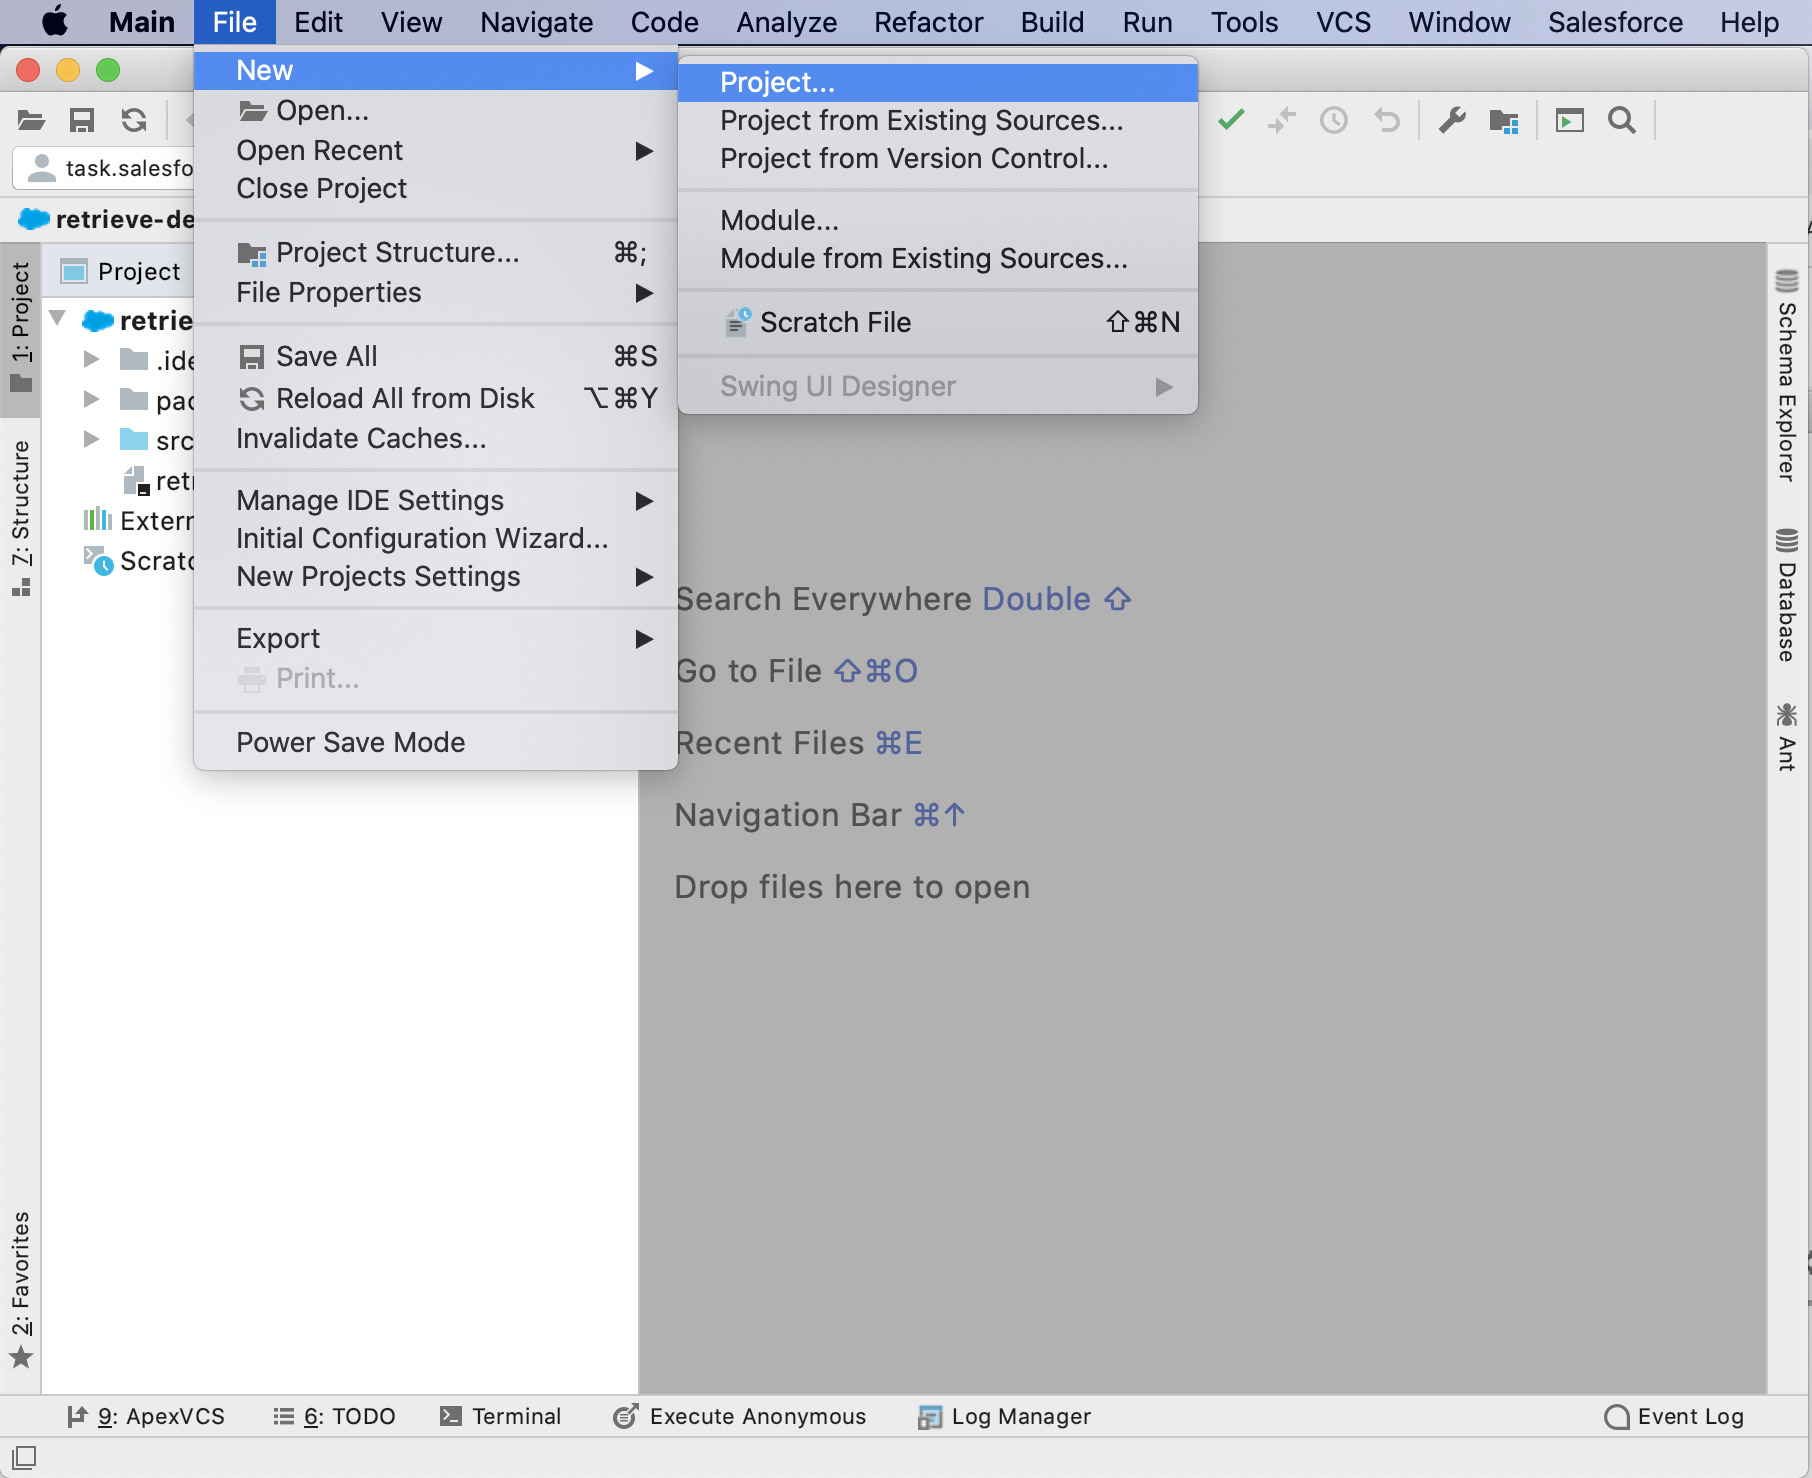 Main Action Toolbar
In both cases, you will see the New Project dialog. Use it to generate Salesforce-specific project structure for developing.
Select the Salesforce project type on the left-hand pane of the dialog. On the right-hand pane, you can configure which kinds of Salesforce metadata should be downloaded. Here is the list of available filters and settings:
Choose Salesforce Account
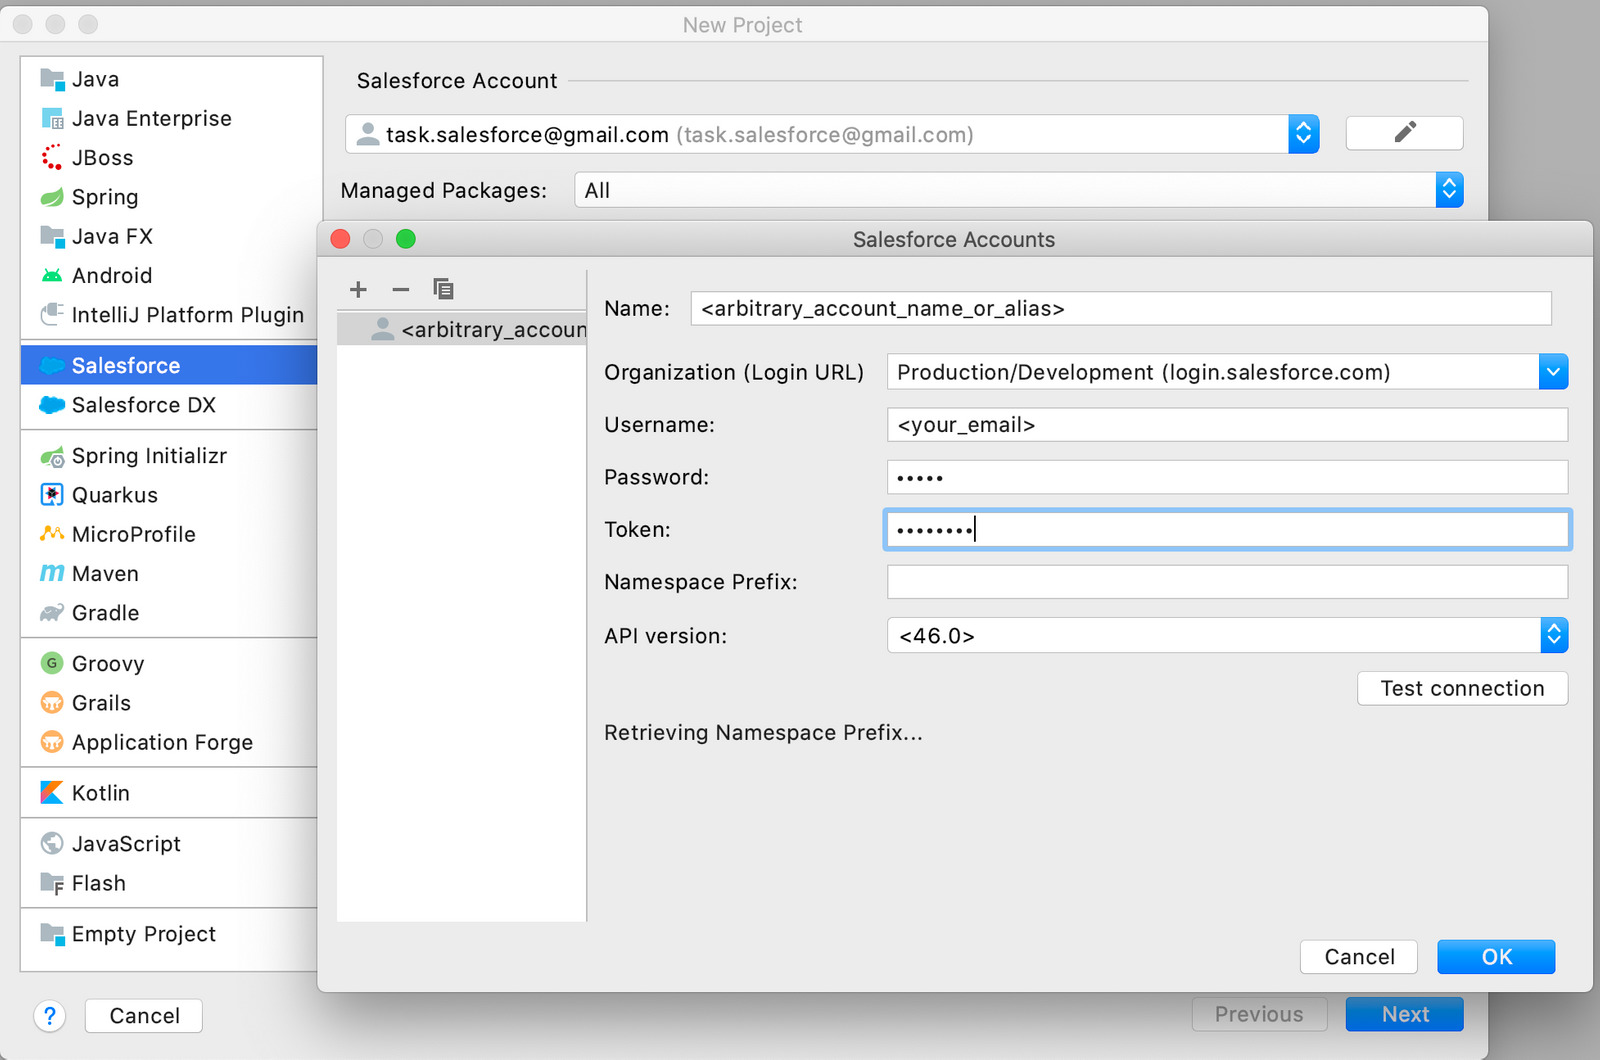 Salesforce Accounts
In the Salesforce Account dropdown list, select source account, or create new by pressing Edit Accounts action. In the opened dialog enter all required data: email, password, token (if required), and API version. Namespace prefix will be retrieved automatically during testing connection.
Choose Managed Packages to Retrieve
 Configure Managed Packages
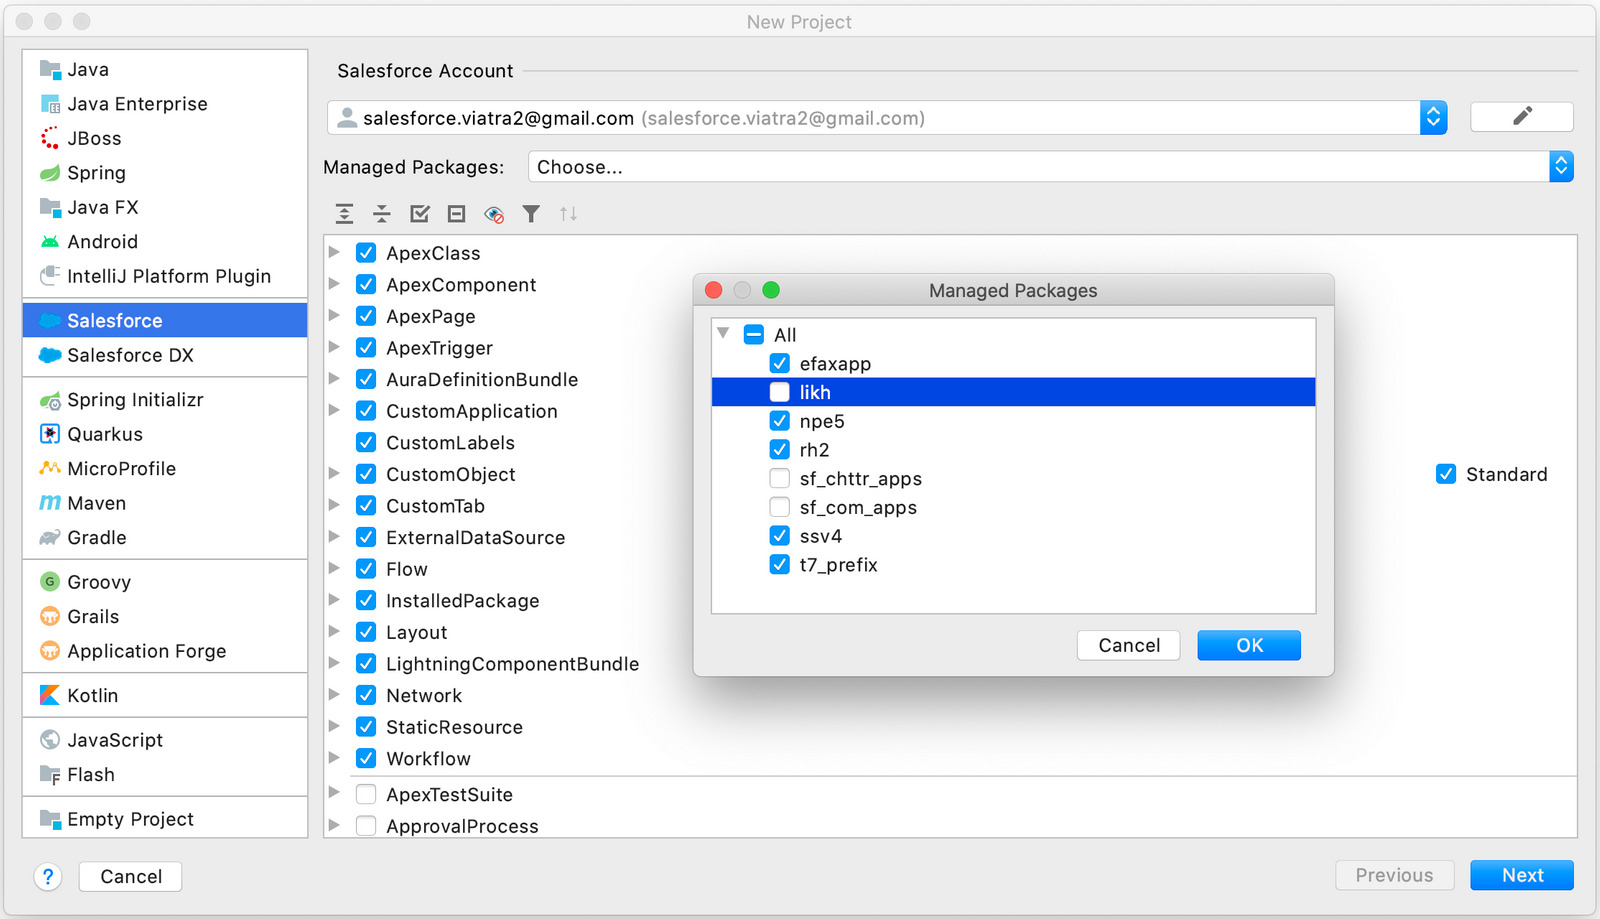
The Managed Packages dropdown list allows us to configure which managed packages should be retrieved during project creation. Available options are: All, None and Choose...
Selecting Choose... item opens Managed Packages dialog where we can configure a set of packages to download.
Metadata Component Set
Most importantly, you get a checkbox tree with the list of metadata files that can be retrieved from Salesforce. Select the files you want to retrieve within your project. The action toolbar allows you to Expand/Collapse all tree nodes, Select/Unselect all checkboxes, Hide All Unselected nodes, and Filter Nodes by Names.
Hide Unselected Nodes
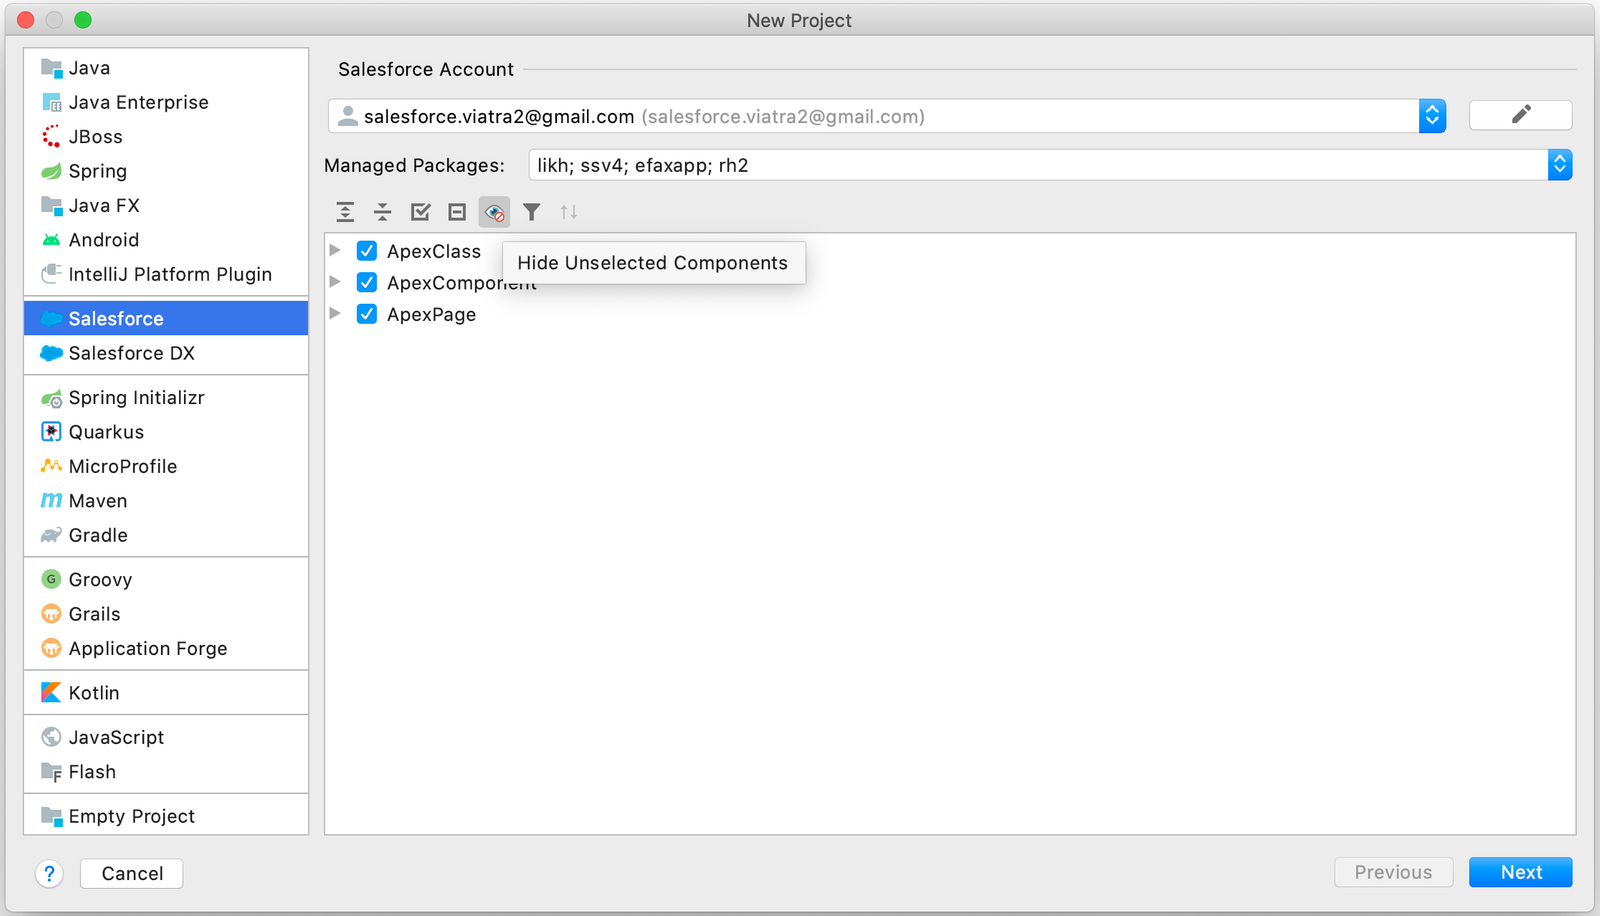 Hide Unselected Nodes
Pattern Name Filter
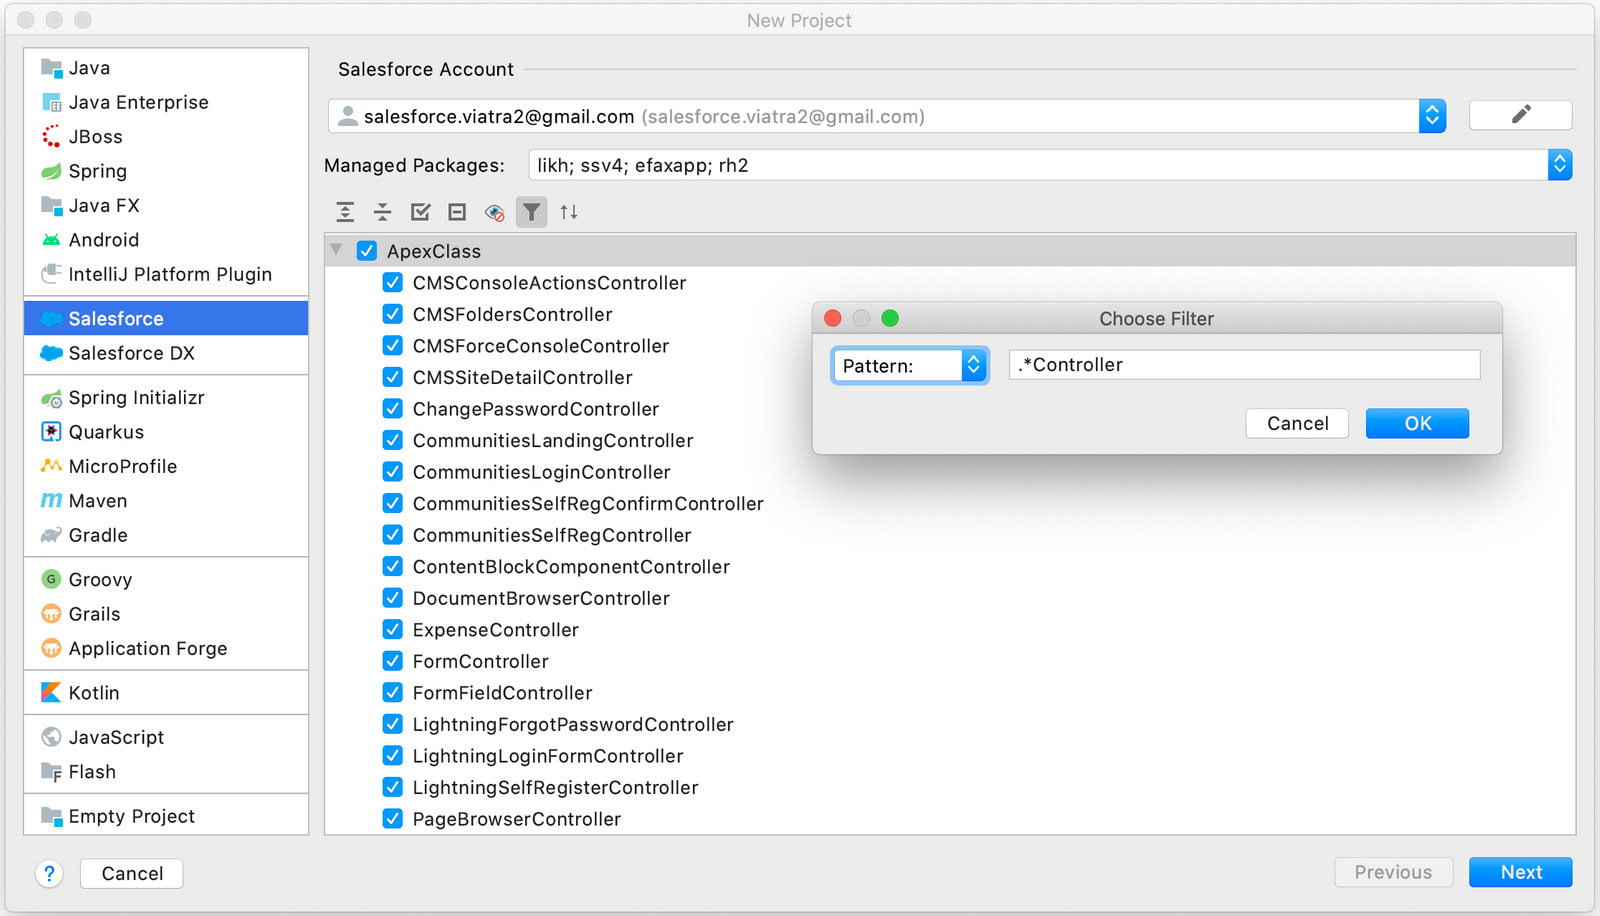 Pattern Name Filter
Prefix Name Filter
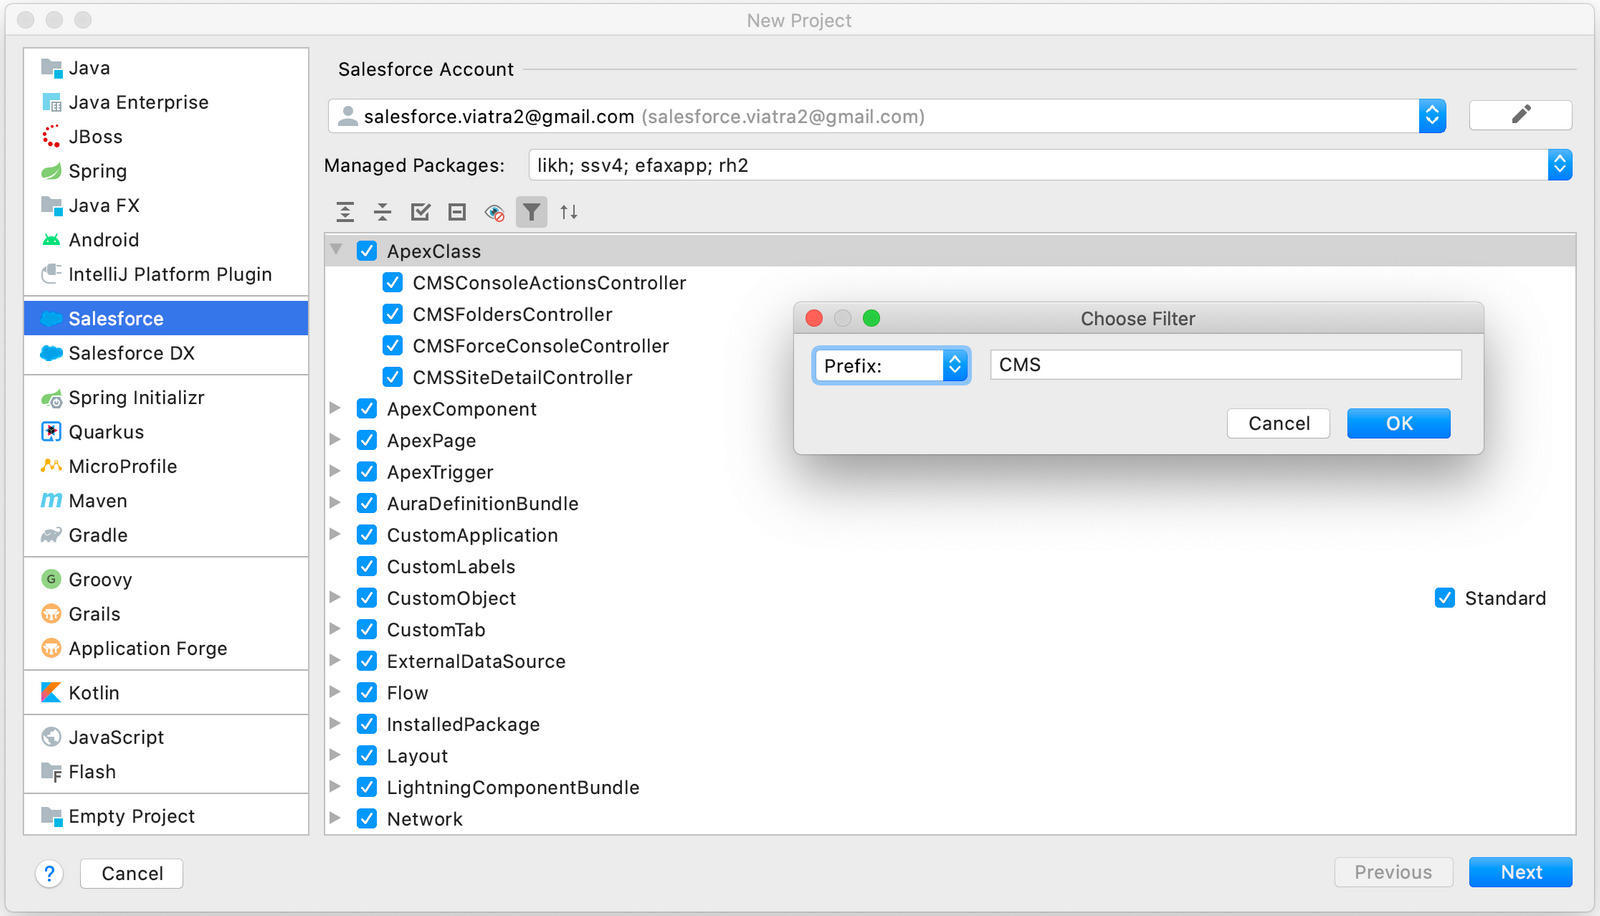 Prefix Name Filter
After entering this information, you need to click the Next button and specify Location to save project files. Once you are complete, click the Finish button and the retrieve process is started.
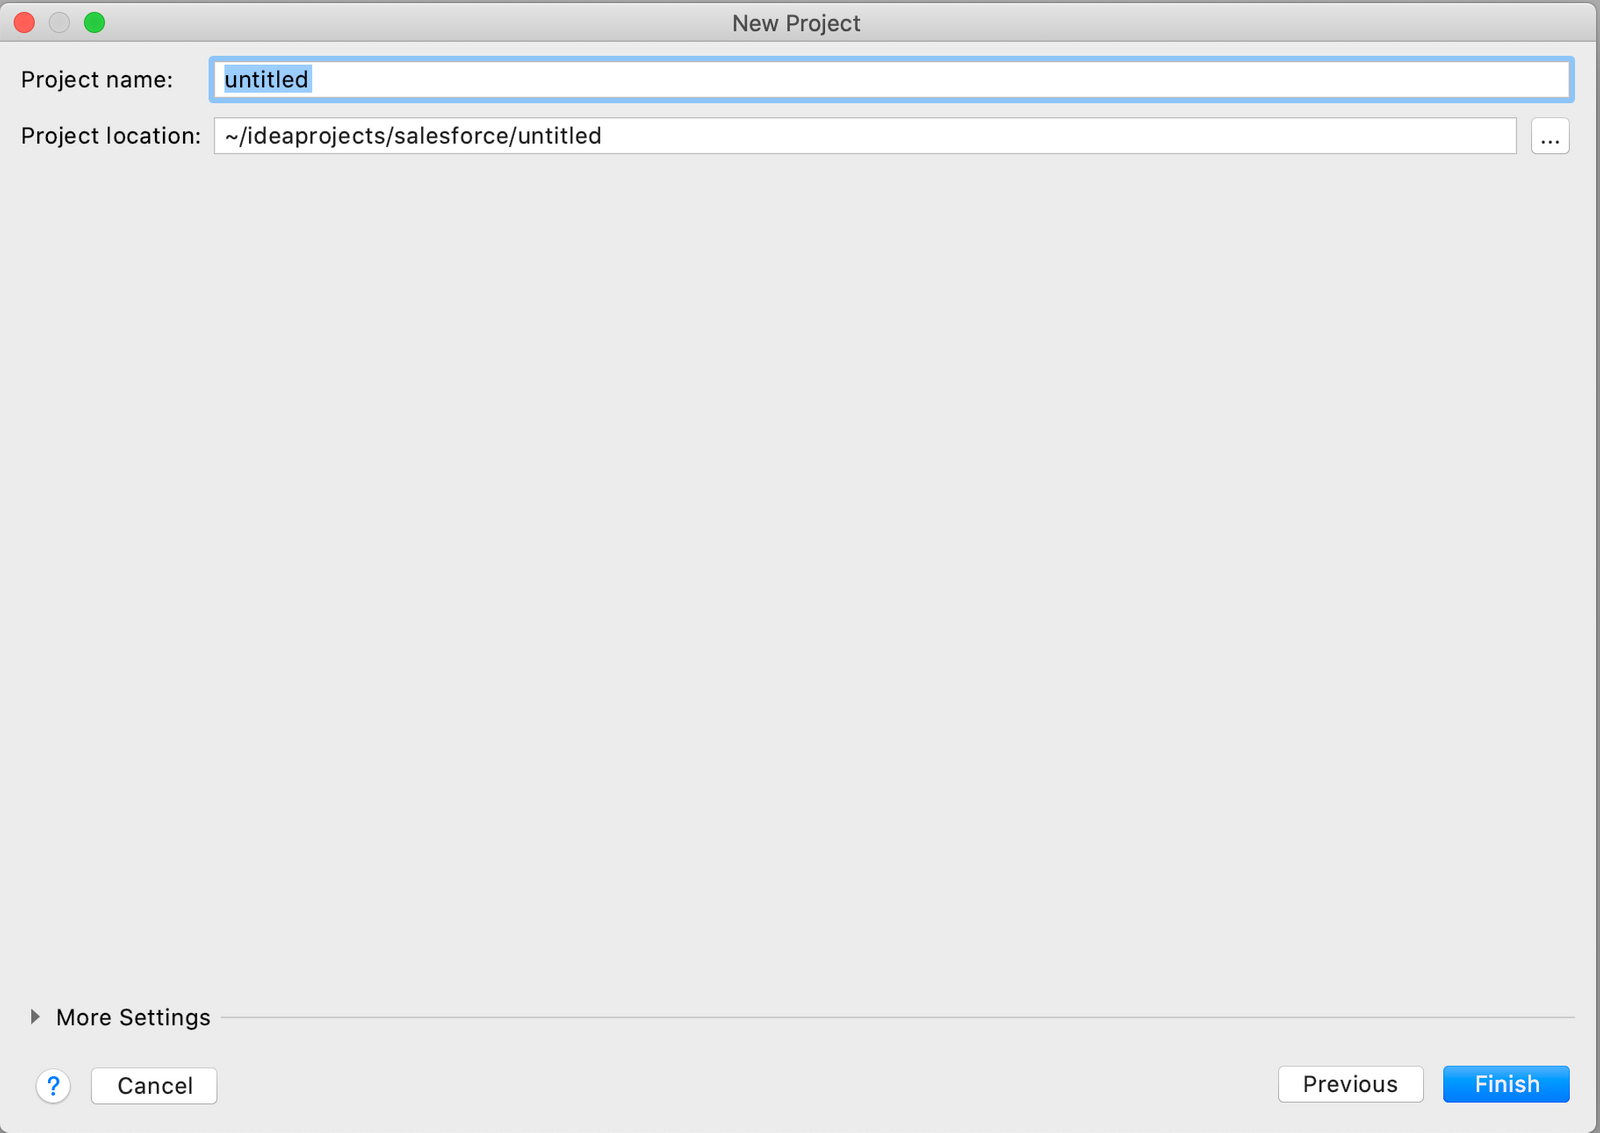 Project Sources Location
JetForcer creates a project with the general Salesforce project structure included package.xml file and the src folder with metadata-specific subdirectories such as classes, pages, components, etc.
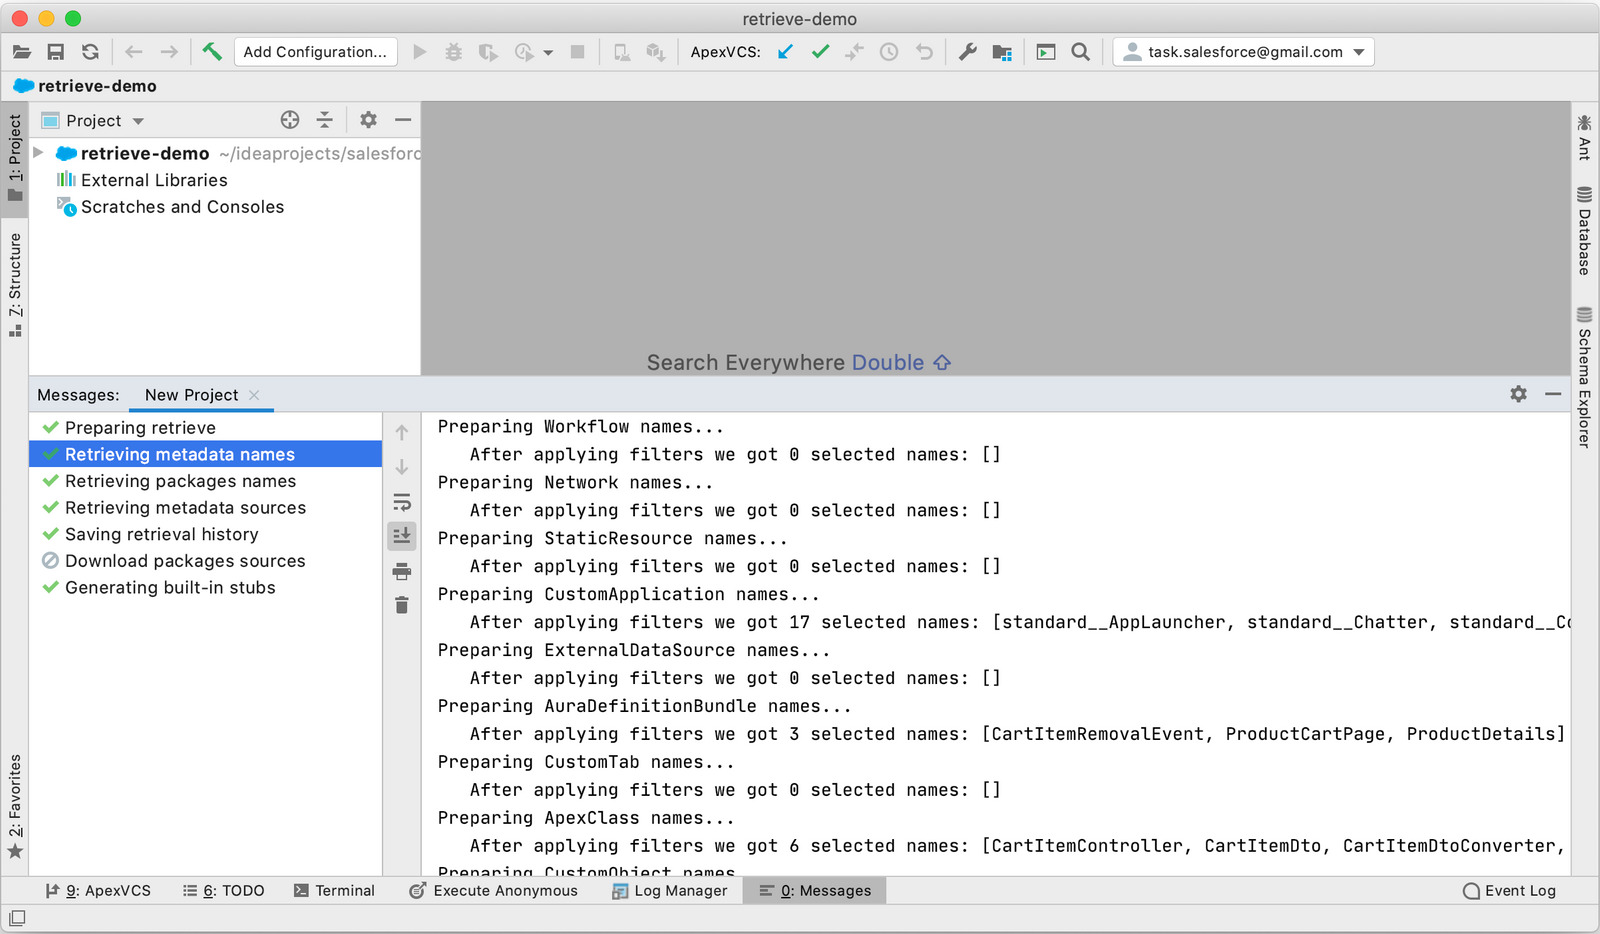
Retrieving process performs in the background, all executed steps can be explored in the dedicated Messages tool window. Here is some of them:
Retrieve Metadata Names
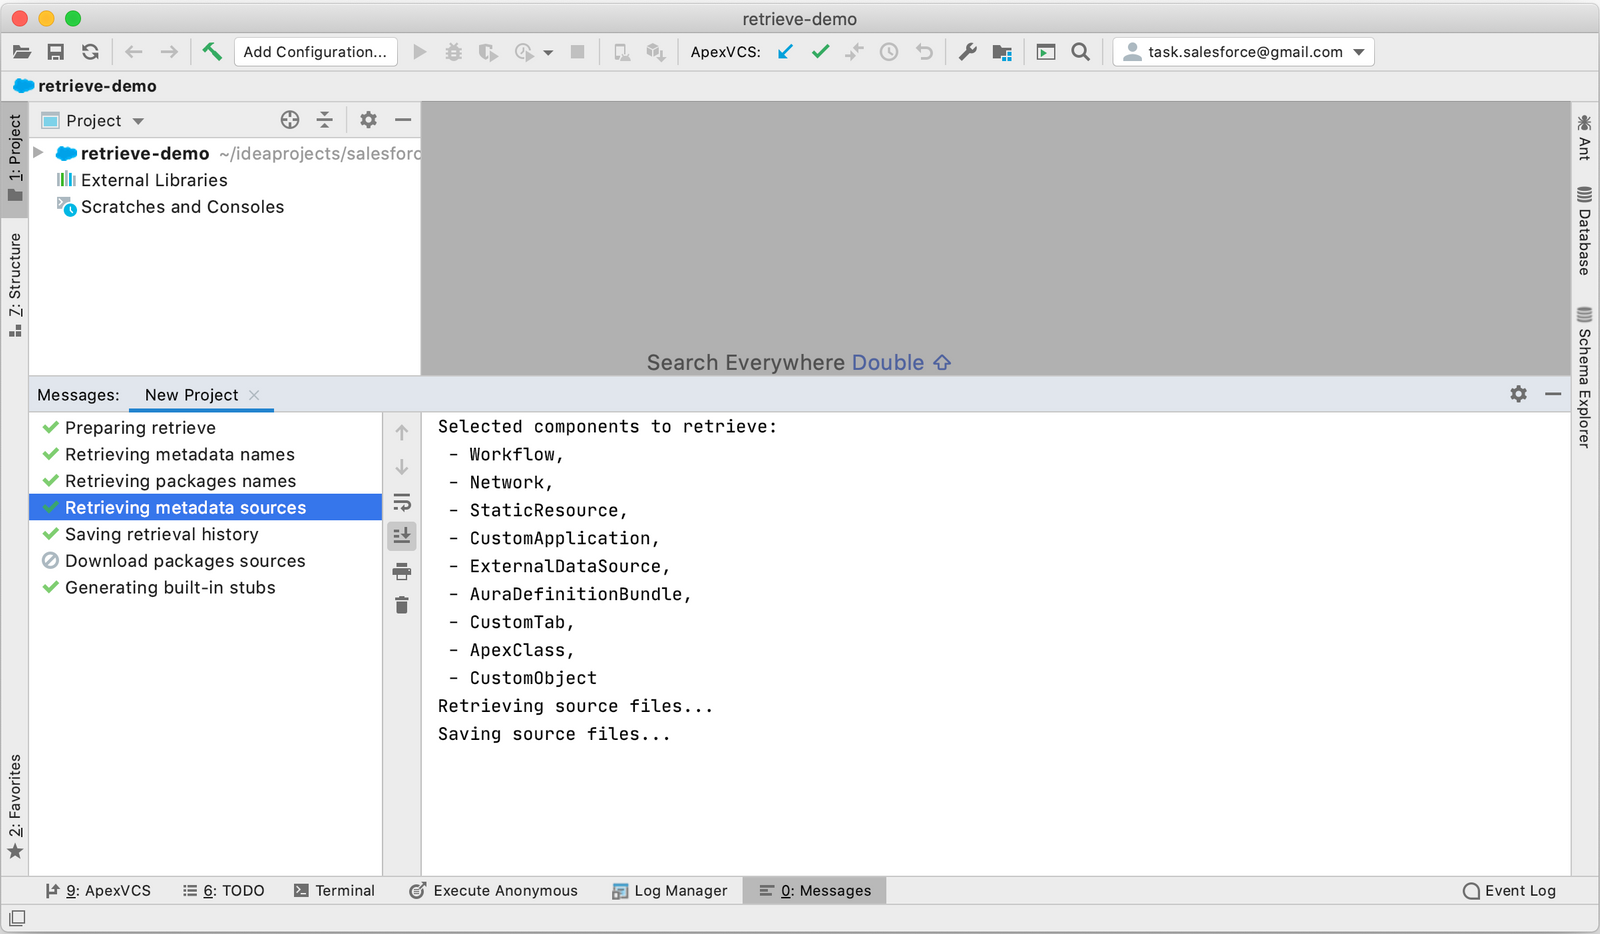
Retrieve Metadata Sources
Saving Retrieval History
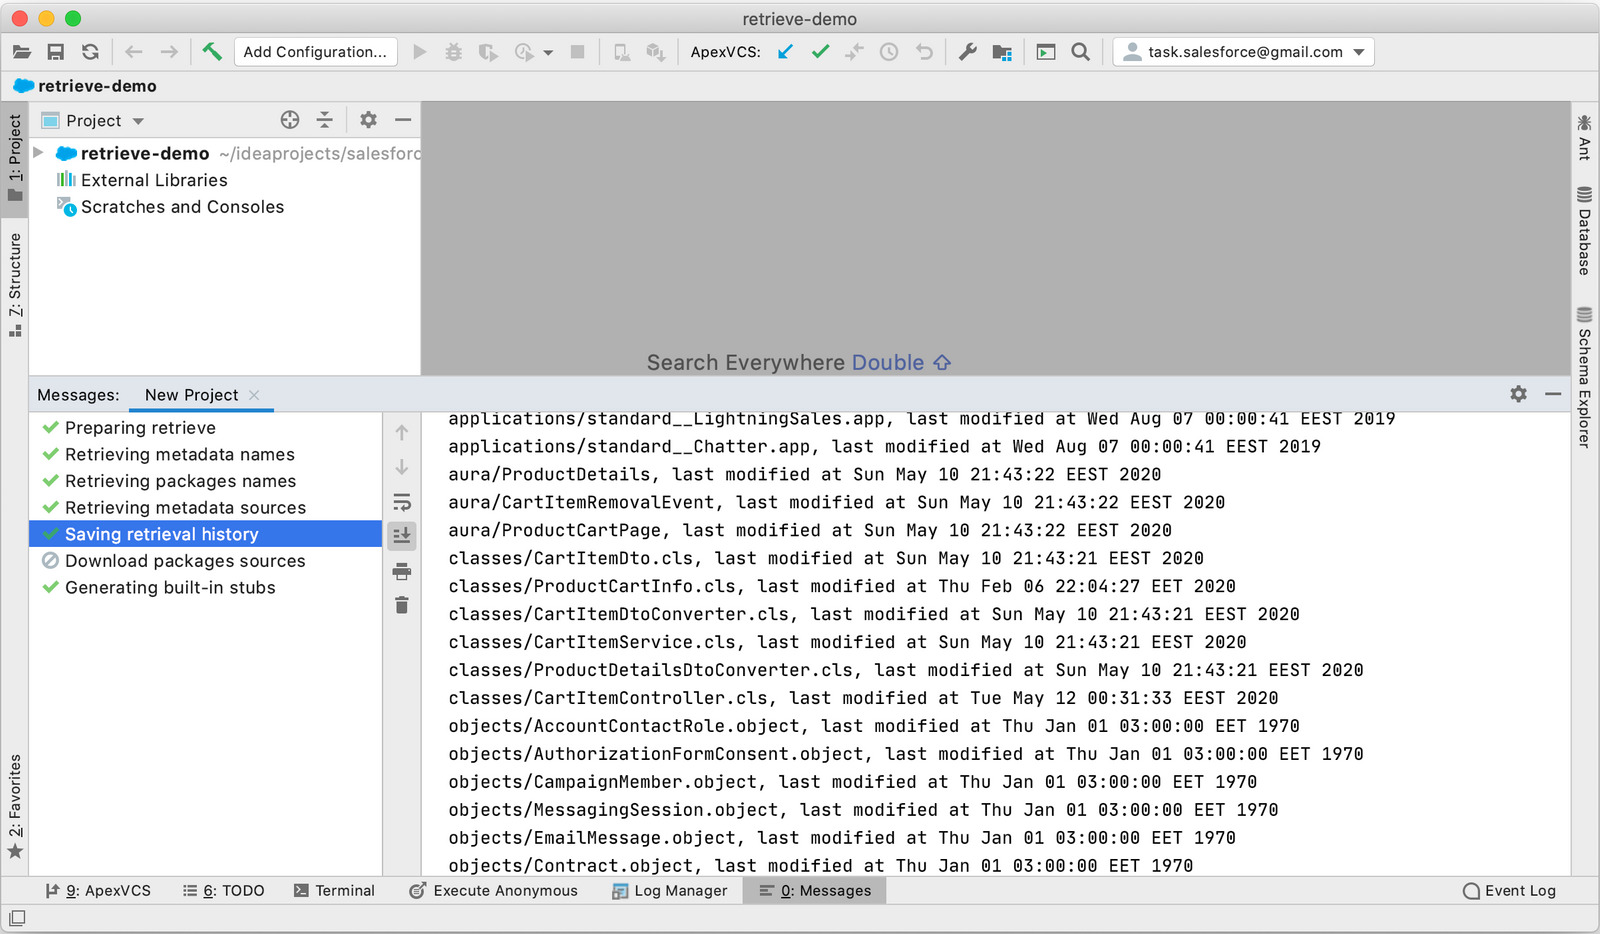
JetForcer stores the last modified timestamps for each retrieved file. These timestamps used to determine which metadata is out-of-date, either modified or created since the last successful retrieval operation. We will talk about that in more detail in the second part of the article.
Generating Stubs
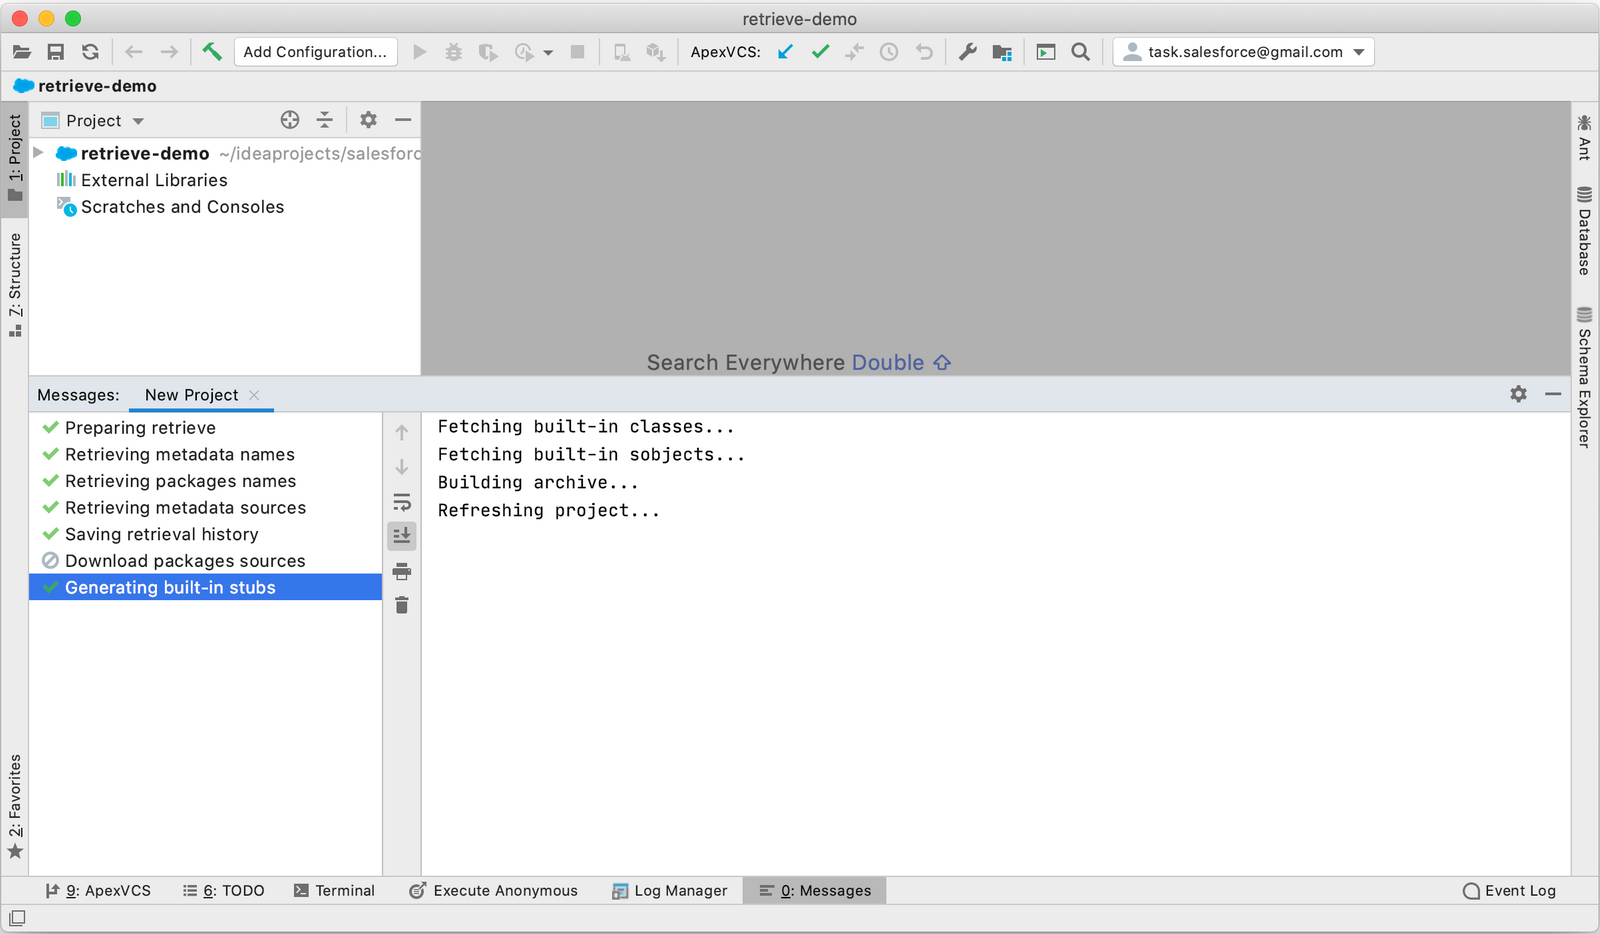
JetForcer generates a builtin stubs jar from the configured Salesforce organization. This archive includes all system classes and SObjects. All of these data are used by JetForcer to provide powerful code editor features such as navigation, code completion, refactorings, and cross-referencing.
How to Retrieve/Refresh changes from Salesforce Org
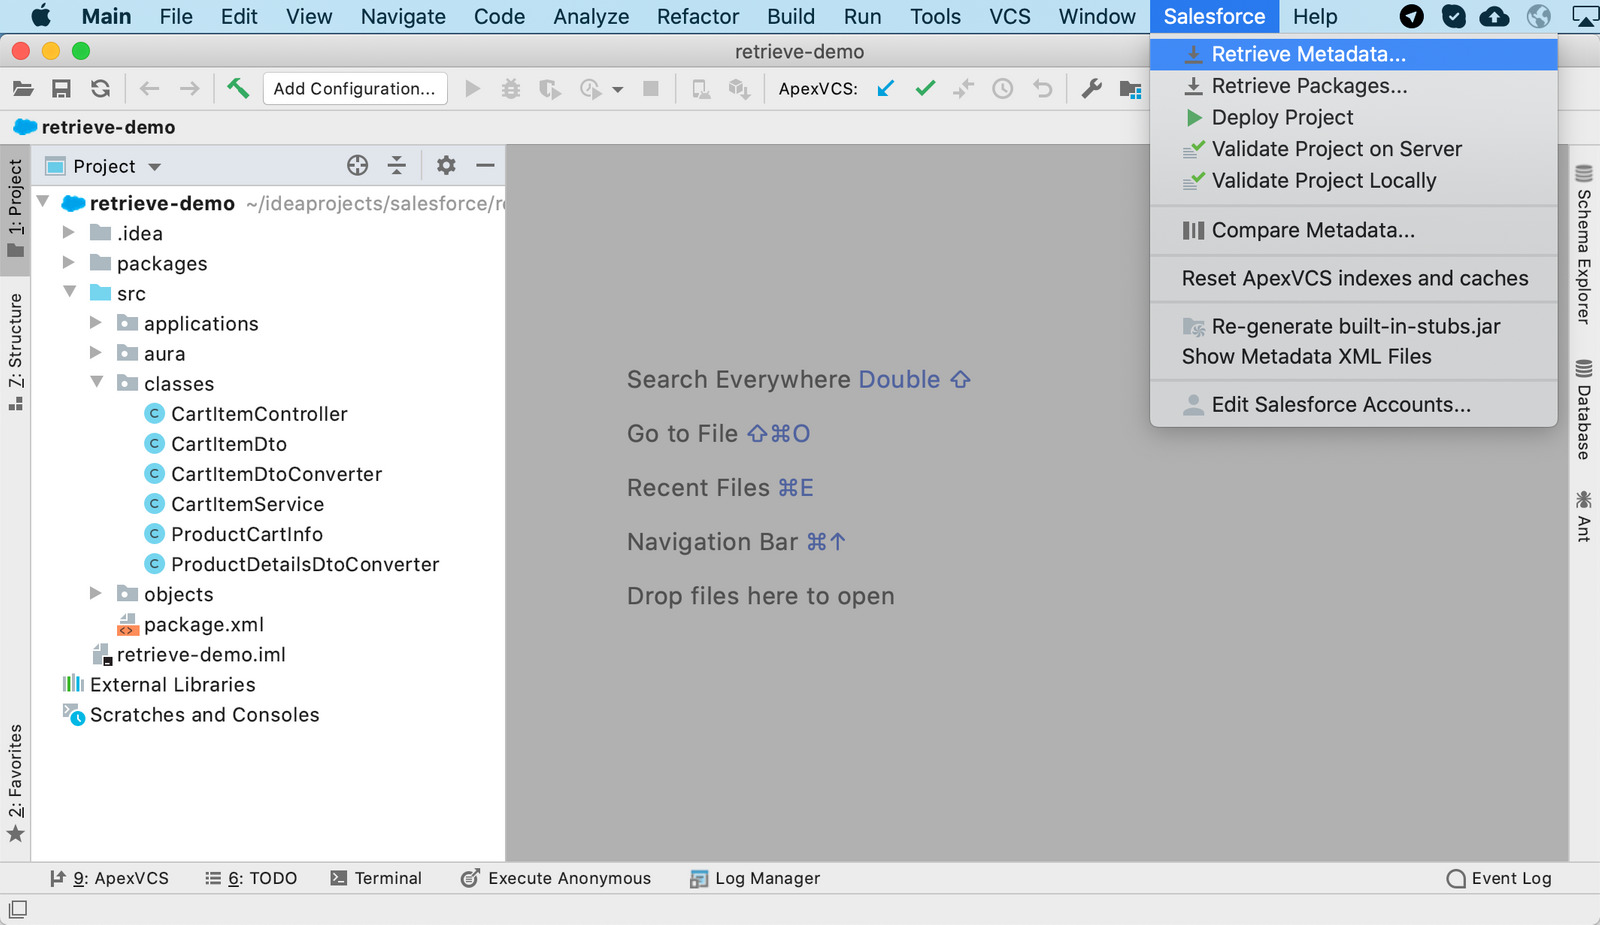
JetForcer provides a handy way to manage metadata set after the creation of a project. It helps you to pull the changes that were made by other developers or to retrieve additional project metadata components, that you didn't download during the creation of a project.
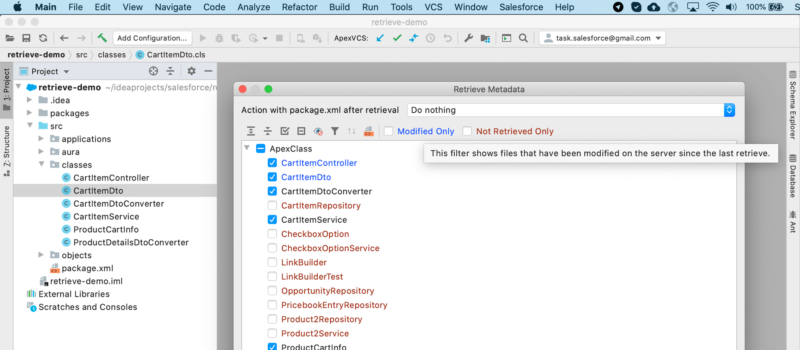
All you need is to open the Retrieve Metadata dialog by calling Salesforce -> Retrieve Metadata... action and select the components you want to retrieve within your project.
Additionally to base filters, this dialog contains Modified Only and Not Retrieved Only filters. They allow us to quickly distinguish which metadata is modified on the server or is not retrieved yet to local sources.

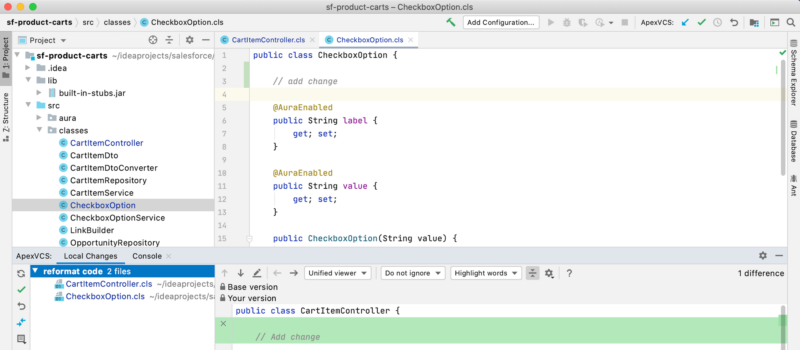
JetForcer highlights with blue mark all files that have been modified on the server since the last retrieve. All files that have not been retrieved into the project will be highlighted with a brown mark.
Summary
Here is a very concise overview of some JetForcer Retrieve capabilities, just to give you a quick start. If you find it interesting, you may download a free 30-day trial version from the official website.
To submit feature requests or just report bugs, use the plugin’s issue tracker. A more detailed tutorial on how to use the plugin along with its features description can be found on the plugin’s site.
Enjoy developing with JetForcer and JetBrains IDEs!